Enabling SMTP AUTH for Mac Mail (Mac OS 10)
In this section we enable SMTP AUTH and SSL. SMTP AUTH allows you to prove you are a legitimate subscriber by providing your user name and password when you send email. This prevents outsiders (mostly SPAMmers) from using our servers to send their SPAM messages. SSL encrypts communication between your computer and our mail server. This keeps your password secure and provides some privacy protection for your email messages.
Follow the instructions for Mozilla Thunderbird if you use that software.
Start up the Mac Mail program if it's not already running.
Under the , select to bring up up the Mail Preferences window.
On the Mail Preferences window click on your SVPAL account on the left side of the window. Then click on the tab to show the details of your SVPAL account on the right.
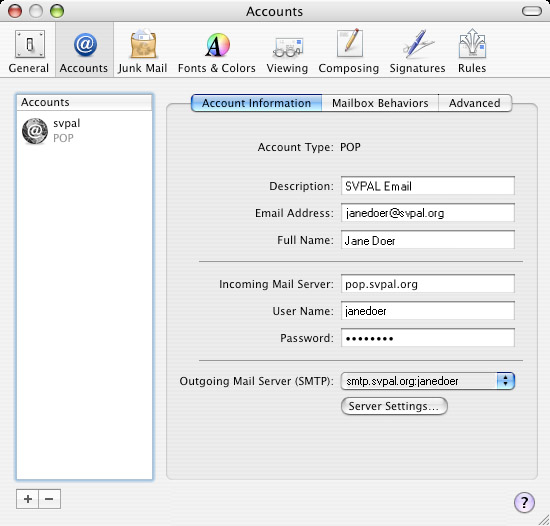
Use the following settings:
| Email Address: | (your SVPAL email address e.g. janedoer@svpal.org) |
| Incoming Mail Server: | pop.svpal.org |
| User Name: | (your user name e.g. janedoer) |
| Password: | (password for the above account) |
Settings not mentioned here may be set as you prefer.
Now click the button to bring up the SMTP Server Options window.
On the SMTP Server Options window use the following settings:
| Use Secure Sockets Layer (SSL): | CHECKED |
| Server port: | 465 |
| Authentication: | Password |
| User Name: | (your user name e.g. janedoer) |
| Password: | (password for the above account) |
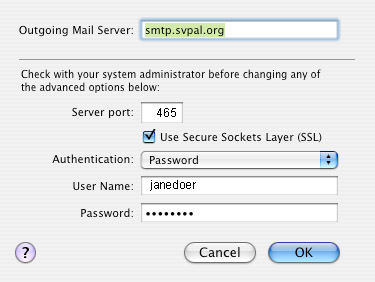
Settings not mentioned here may be set as you prefer.
Click the button to save your changes.
Now click the tab on the Accounts window.
On the Advanced tab on the Accounts window Use the following settings:
| Use SSL: | CHECKED |
| Port: | 995 |
| Authentication: | Password |
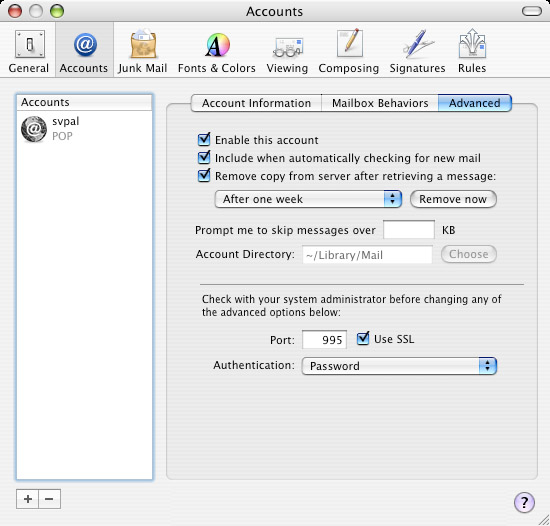
Settings not mentioned here may be set as you prefer.
Close the Mail Preferences window and proceed to test out your new settings.